教程丨 黑电商 WordPress 主题、插件及优化汇总
每次单开文章介绍新增的功能太麻烦,也为了给自己做个备份,给大家做个参考,本文会详细介绍本站目前使用的插件及优化,因数据较多,还在一直更新中。
本站的架构
WordPress是使用PHP语言开发的博客平台,用户可以在支持PHP和MySQL数据库的服务器上架设属于自己的网站。也可以把 WordPress当作一个内容管理系统(CMS)来使用。
WordPress是一款个人博客系统,并逐步演化成一款内容管理系统软件,它是使用PHP语言和MySQL数据库开发的,用户可以在支持 PHP 和 MySQL数据库的服务器上使用自己的博客。
本站的主题
CorePress主题,强大的WordPress定制主题, 体积小,性能强,功能多,不可多得的一款高性能,高颜值主题。
WordPress程序:WordPress
CorePress主题:CorePress
本站的插件
本站的其他优化
修改位置:CorePress: 主题页脚 (footer.php)
在第13行下面添加:
/* 回复可见锁CSS------------------------- */
.post-content p {
    margin-block: 10px;
    line-height: 2;
    word-wrap: break-word;
    font-size: 16px;
}
.corepress-reply-to-read {
    display: block;
    background: repeating-linear-gradient(145deg,#f2f6fc,#f2f6fc 15px,#fff 0,#fff 25px);
    padding: 15px 0;
    text-align: center;
    position: relative;
    -webkit-user-select: none;
    -moz-user-select: none;
    -ms-user-select: none;
    user-select: none;
    line-height: normal;
}
.corepress-reply-to-read i {
    color: #a5a5a5;
    padding-right: 5px;
}
.fa, .fas, .far {
    font-family: "Font Awesome 5 Pro";
    font-weight: 900;
}
a {
    text-decoration: none;
    color: var(--Maincolor);
}
/* 回复可见锁CSS------------------------- */WordPress在上传图片和文件,名称是没有变化,如果上传更多的图片和文件,在后台的媒体库看到列表中的文件名称都很乱,格式不统一。
解决方法
将下面的代码加入到 functions.php 中合适位置,
// WordPress上传图片和文件按日期时间自动重命名
add_filter('wp_handle_upload_prefilter', 'custom_upload_filter' );
function custom_upload_filter( $file ){
$info = pathinfo($file['name']);
$ext = $info['extension'];
$filedate = date('YmdHis').rand(10,99);//为了避免时间重复,再加一段2位的随机数
$file['name'] = $filedate.'.'.$ext;
return $file;
}
CSS
在主题根目录下找到 style.css 文件,在合适位置加入如下代码:
/* Logo扫光开始 */.header-logo {
    position:relative;
    float:left;
    margin-right:10px;
    padding:5px 0;
    overflow:hidden;
}
.header-logo  a:before {
    content:"";
    position:absolute;
    left:-665px;
    top:-460px;
    width:200px;
    height:15px;
    background-color:rgba(255,255,255,.5);
    -webkit-transform:rotate(-45deg);
    -moz-transform:rotate(-45deg);
    -ms-transform:rotate(-45deg);
    -o-transform:rotate(-45deg);
    transform:rotate(-45deg);
    /*角度倾斜45*/-webkit-animation:searchLights 1s ease-in 1s infinite;
    -o-animation:searchLights 1s ease-in 1s infinite;
    animation:searchLights 2s ease-in 2s infinite;
    /*光扫过去的时间,自己修改,可以加快*/1s ease-in表示扫过去时间
}
@-webkit-keyframes searchLights {
    0% {
    left:-100px;
    top:0;
}
to {
    left:120px;
    top:100px;
}
}@-o-keyframes searchLights {
    0% {
    left:-100px;
    top:0;
}
to {
    left:120px;
    top:100px;
}
}@-moz-keyframes searchLights {
    0% {
    left:-100px;
    top:0;
}
to {
    left:120px;
    top:100px;
}
}@keyframes searchLights {
    0% {
    left:-100px;
    top:0;
}
to {
    left:120px;
    top:100px;
}
}
/* Logo扫光结束 */
效果演示
可以根据自己的DIY
代码部署
第一步:
以CorePress-Pro主题为例,新建websitestat.php文件复制如下代码,上传至主题widgets文件夹;
<?php
// WordPress统计信息小工具
// 网站信息统计
// 定义小工具的类 EfanWebsitestat
class EfanWebsitestat extends WP_Widget{
  function __construct(){
    // 定义小工具的构造函数
    $widget_ops = array('classname' => 'widget_Websitestat', 'description' => '显示网站的统计信息');
    parent::__construct(false, '网站统计', $widget_ops);
  }

  function form($instance){
    // 表单函数,控制后台显示
    // $instance 为之前保存过的数据
    // 如果之前没有数据的话,设置默认量
    $instance = wp_parse_args(
      (array)$instance,
      array(
        'title' => '网站信息统计',
        'establish_time' => '2000-01-01'
      )
    );

    $title = htmlspecialchars($instance['title']);
    $establish_time = htmlspecialchars($instance['establish_time']);

    // 表格布局输出表单
    $output = '<table>';
    $output .= '<tr><td>标题</td><td>';
    $output .= '<input id="'.$this->get_field_id('title') .'" name="'.$this->get_field_name('title').'" type="text" value="'.$instance['title'].'" />';
    $output .= '</td></tr><tr><td>建站时间:</td><td>';
    $output .= '<input id="'.$this->get_field_id('establish_time') .'" name="'.$this->get_field_name('establish_time').'" type="text" value="'.$instance['establish_time'].'" />';
    $output .= '</td></tr></table>';
    echo $output;
  }

  function update($new_instance, $old_instance){
    // 更新数据的函数
    $instance = $old_instance;
    // 数据处理
    $instance['title'] = strip_tags(stripslashes($new_instance['title']));
    $instance['establish_time'] = strip_tags(stripslashes($new_instance['establish_time']));
    return $instance;
  }

  function widget($args, $instance){
    extract($args); //展开数组
    $title = apply_filters('widget_title',empty($instance['title']) ? ' ' : $instance['title']);
    $establish_time = empty($instance['establish_time']) ? '2021-01-01' : $instance['establish_time'];
    echo $before_widget;
    echo $before_title . $title . $after_title;
    echo '<div class="widgest-boys"><table>';
    $this->efan_get_websitestat($establish_time);
    echo '</table></div>';
    echo $after_widget;
  }

  function efan_get_websitestat($establish_time){
    // 相关数据的获取
    global $wpdb;
    $count_posts = wp_count_posts();
    $published_posts = $count_posts->publish;
    $comments_count = $wpdb->get_var("SELECT COUNT(*) FROM $wpdb->comments");
    $time = floor((time()-strtotime($establish_time))/86400);
    $count_tags = wp_count_terms('post_tag');
    $count_pages = wp_count_posts('page');
    $link = $wpdb->get_var("SELECT COUNT(*) FROM $wpdb->links WHERE link_visible = 'Y'");
    $users = $wpdb->get_var("SELECT COUNT(ID) FROM $wpdb->users");
    $last = $wpdb->get_results("SELECT MAX(post_modified) AS MAX_m FROM $wpdb->posts WHERE (post_type = 'post' OR post_type = 'page') AND (post_status = 'publish' OR post_status = 'private')");
    $last = date('Y-m-d H:i:s', strtotime($last[0]->MAX_m));
    $total_views = $wpdb->get_var("SELECT SUM(meta_value+0) FROM $wpdb->postmeta WHERE meta_key = 'views'");
    // 显示数据
    $output = '<tr><td>文章总数:';
    $output .= $published_posts;
    $output .= ' 篇</td></tr>';
    $output .= '<tr><td>留言总数:';
    $output .= $comments_count;
    $output .= ' 条</td></tr>';
    $output .= '<tr><td>标签总数:';
    $output .= $count_tags;
    $output .= ' 个</td></tr>';
    $output .= '<tr><td>浏览次数:';
    $output .= $total_views;
    $output .= ' 次</td></tr>';
    $output .= '<tr><td>运行天数:';
    $output .= $time;
    $output .= ' 天</td></tr>';
    $output .= '<tr><td>建站时间:';
    $output .= $establish_time;
    $output .= '</td></tr>';
    $output .= '<tr><td>最后更新:';
    $output .= $last;
    $output .= '</td></tr>';
    //页面生成耗时+数据库查询
    $output .= '<tr><td>生成耗时:';
    $output .= timer_stop(0,5);
    $output .= '秒</td></tr>';

    echo $output;
  }
}
function EfanWebsitestat(){
  // 注册小工具
  register_widget('EfanWebsitestat');
}
add_action('widgets_init','EfanWebsitestat');
?>
第二步:
将以下代码添加到你当前使用的WordPress主题的 functions.php 文件中,注意不要放置在子主题中,实际测试不生效;
// 侧边栏网站统计小工具
include("widgets/websitestat.php");
第三步:
进入后台,选择“外观-小工具”,找到“网站统计”小工具,将其添加至需要位置即可生效。

第四步:
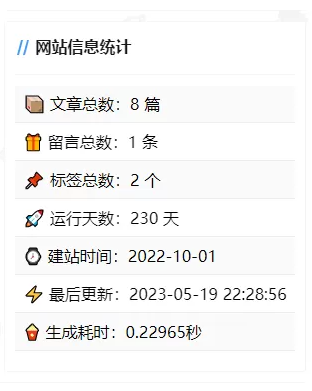
针对CorePress-Pro主题添加数据统计小工具后,默认宽度会超出页面范围,效果如下图;
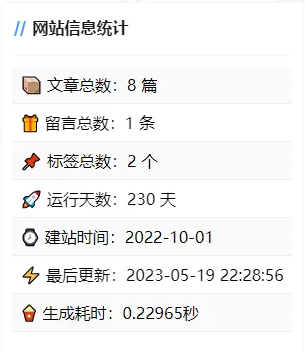
我们需要找到这个文件CorePress-Pro/static/css/main.css,在文件中搜索min-width:450px;将其改成/*min-width:450px;*/或min-width:100%;上传至站点覆盖;
因大部分站点都开启了CDN,若刷新网页未生效,您可尝试清除CDN缓存和浏览器缓存,快来看看效果吧。
如何做到不显示某项统计
修改注释或删除不需要显示的项目,例如
    //$output .= '<tr><td>建站时间:';
    //$output .= $establish_time;
    //$output .= '</td></tr>';
效果演示
代码部署
第一步
修改页脚文件
找到主题根目录下footer.php 文件,使用文本编辑器打开;
找到78~87行,如下图所示;
                <div class="footer-info">
                    <?php
                    if ($set['routine']['icp'] != null) {
                        echo '<span class="footer-icp"><img class="ipc-icon" src="' . file_get_img_url('icp.svg') . '" alt=""><a href="https://beian.miit.gov.cn/" target="_blank">' . $set['routine']['icp'] . '</a></span>';
                    }
                    if ($set['routine']['police'] != null) {
                        echo '<span class="footer-icp"><img class="ipc-icon" src="' . file_get_img_url('police.svg') . '" alt=""><a href="http://www.beian.gov.cn/portal/registerSystemInfo/" target="_blank">' . $set['routine']['police'] . '</a></span>';
                    }
                    ?>
                </div>
复制以下代码粘贴进行覆盖,注意先进行备份,避免误操作;
<div class="footer-info">
<?php
if ($set['routine']['icp'] != null) {
    echo '<div class="github-badge"><a rel="external nofollow noopener noreferrer" href="//beian.miit.gov.cn/" target="_blank" title="工业和信息化部政务服务平台 ICP/IP地址/域名信息备案管理系统"><span class="badge-subject">皖ICP备</span><span class="badge-value bg-tab1-1">' . $set['routine']['icp'] . '</span></a></div>';
}
if ($set['routine']['police'] != null) {
    echo '<div class="github-badge"><a rel="external nofollow noopener noreferrer" href="//www.beian.gov.cn/portal/registerSystemInfo?recordcode=34110202000076" target="_blank" title="公安机关互联网站安全管理服务平台"><span class="badge-subject">皖公网安备</span><span class="badge-value bg-tab1-2">' . $set['routine']['police'] . '</span></a></div>';
}
?>
粘贴后注意修改备案省份,如皖ICP备、皖公网安备,将“皖”改成自己备案的省份,如苏ICP备、粤ICP备等,这里按自己的来;
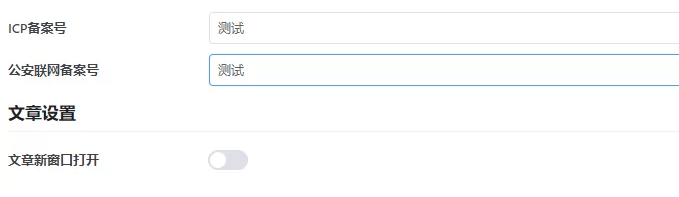
修改主题备案信息
进入WordPress后台-主题设置-常规设置-ICP备案号&公安联网备案号,因为上面我们已经手动输入了前缀“皖ICP备”,在此处删除,如我下图设置,只留后缀数字,避免后面重复显示:
第二步
Css美化
因CorePress Pro 支持子主题,在子主题根目录下找到style.css文件,合适位置粘贴如下代码,上传即可。
.github-badge {
margin-right: 10px;
margin-top: 10px;
display: inline-block;
border-radius: 4px;
line-height: 15px;
font-size: 12px
}

.github-badge .badge-subject {
display: inline-block;
background-color: #999;
padding: 4px 4px 4px 6px;
border-top-left-radius: 4px;
border-bottom-left-radius: 4px;
color: #f2f2f2!important
}

.github-badge .badge-value {
display: inline-block;
padding: 4px 6px 4px 4px;
border-top-right-radius: 4px;
border-bottom-right-radius: 4px
}

.github-badge .bg-tab1-1 {
background: linear-gradient(to right,#a86af9,#3ca5f6);
color: #f2f2f2!important
}

.github-badge .bg-tab1-2 {
background: linear-gradient(to right,#009688,#ff9800);
color: #f2f2f2!important
}
至此,清除缓存,刷新网页即可生效。
部署过程若出现问题,可在下方联系我
理论美化代码只在
CorePress Pro主题生效,动手能力强,修改代码所有网站都可以使用
免费版的放在主题的style.css文件,pro放在子主题即可!
[cp-post-item]:hover {
	background: #edededba;
	transform: scale(1.03);
	-webkit-transform: scale(1.03);
	-moz-transform: scale(1.03);
	-o-transform: scale(1.03);
	-ms-transform: scale(1.03);
	box-shadow:5px 5px 10px gray;
}
免费版的放在主题的style.css文件,pro放在子主题即可!
css代码如下:
::-webkit-scrollbar {
	width: 8px;
	height: 1px;
}
::-webkit-scrollbar-thumb {
	background-color: #12b7f5;
	background-image: -webkit-linear-gradient(45deg, rgba(255, 93, 143, 1) 25%, transparent 25%, transparent 50%, rgba(255, 93, 143, 1) 50%, rgba(255, 93, 143, 1) 75%, transparent 75%, transparent);
}
::-webkit-scrollbar-track {
	-webkit-box-shadow: inset 0 0 5px rgba(0,0,0,0.2);
	background: #f6f6f6;
}
免费版的放在主题的style.css文件,pro放在子主题即可!
css代码如下:
:root{--theme-color:#f04494;--focus-shadow-color:rgba(240,68,148,.4);--mian-max-width:1200px;}
.menu-footer-list {
	display: inline-block;
	border-radius: 4px;
	text-shadow: none;
	font-size: 12px;
	color: #fff !important;
	line-height: 15px;
	margin-bottom: 5px;
}
.menu-footer-list .menu-item a {
	color: #fff !important;
	font-size: 13px;
}
.menu-footer-list .menu-item{
	display: inline-block;
	background-color: #4d4d4d;
	padding: 4px 4px 4px 6px;
	border-top-left-radius: 20px;
	border-bottom-left-radius: 20px;
	margin-right: 5px;;
}

.menu-footer-list li:nth-child(6n+1) {
	background-color: #4dc820;
}
.menu-footer-list li:nth-child(6n+2) {
	background-color: #8833d7;
}
.menu-footer-list li:nth-child(6n+3) {
	background-color: orange;
}
.menu-footer-list li:nth-child(6n+4) {
	background-color: #e91515;
}
.menu-footer-list li:nth-child(6n+5){
	background-color: #007ec6;
}
.menu-footer-list li:nth-child(6n) {
	background-color: #e323c2;
}

#menu-footer-nav li:hover {
  transform: scale(1.1);
	-webkit-transform: scale(1.1);
	-moz-transform: scale(1.1);
	-o-transform: scale(1.1);
	-ms-transform: scale(1.1);
}
html代码
代码中名称以及链接修改成自己的,还有代码中开头和结尾的p标签删除就行了!
</p>
<nav class="menu-footer-plane">
<ul id="menu-footer-nav" class="menu-footer-list">
<li id="menu-item-901" class="menu-item menu-item-901"><a target="_blank" rel="noopener" href="https://iuiui.cn/wp-content/plugins/cp-link-open/link.php?a=aHR0cHM6Ly9hb2NnLmNuLw==">iu导航 </a></li>
<li id="menu-item-892" class="menu-item menu-item-892"><a href="https://iuiui.cn/links.html">友链申请</a></li>
<li id="menu-item-893" class="menu-item menu-item-893"><a href="https://iuiui.cn/message.html">留言建议</a></li>
<li id="menu-item-894" class="menu-item menu-item-894"><span data-mce-type="bookmark" style="display: inline-block; width: 0px; overflow: hidden; line-height: 0;" class="mce_SELRES_start"></span><a href="https://iuiui.cn/qrcl.html">免责声明</a></li>
</ul>
</nav>
<p>css代码如下,免费版的放在主题的style.css文件,pro放在子主题即可!
/*底部申请友情链接按钮美化*/
.friend-links-apply {
	padding: 5px 10px;
	color: white !important;
	text-decoration: none;
	border-radius: 50px;
	background: linear-gradient(to right, #fd0808, #df05ed);
	background-size: 200% auto;
	animation: flowingGradient 3s ease-in-out infinite;
	opacity: 1;
	box-shadow: 0 2px 4px rgba(0, 0, 0, 0.5);
	filter: brightness(130%);
}

.friend-links-apply:hover {
	transform: scale(1.1);
	-webkit-transform: scale(1.1);
	-moz-transform: scale(1.1);
	-o-transform: scale(1.1);
	-ms-transform: scale(1.1);
}

@keyframes flowingGradient {
  0% {
    background-position: 0% 50%;
  }
  50% {
    background-position: 100% 50%;
  }
  100% {
    background-position: 0% 50%;
  }
}
如图中演示的效果,免费版的放在主题的style.css文件,pro放在子主题即可!
css代码如下:
/** 小工具 mac 样式 */
:root {
    --border-hd: 10px !important;
}
body header {
    box-shadow: 0 0 20px 0 rgb(0 0 0 / 5%);
}
.post-list-page-plane {
    background-color: #fff;
}
body .widget-title {
    border-bottom: none;
}
.friend-links {
    overflow: hidden;
}
body .widget-title:before {
    width: 12px;
    height: 12px;
    transform: none;
    background: #fc625d;
    border-radius: 50%;
    top: 10px;
}
body .widget-title:after {
    background-color: #fdbc40;
    width: 12px;
    height: 12px;
    transform: none;
    border-radius: 50%;
    left: 20px;
    top: 10px;
}

body .widget-title {
    padding-left: 40px;
}
.widget-admin-author-contact-item-icon {
    border-bottom-left-radius:2px!important;
}
效果图:

代码:
可用变量
<#username#>:当前文章作者名
<#postname#>:当前文章标题
<#url#>:当前文章地址
<#authorurl#>:当前作者页面地址
换行请使用html代码:<br> .post-turn-page-main a {
white-space: nowrap;
width: 100%;
overflow: hidden;
text-overflow: ellipsis;
display: block;
}添加以下 css 代码可解决问题

然后将图片上传到 wordpress,再加入以下 css 代码:
header {
    background-color: rgba(255, 255, 255, 0.96);
    background-image: url(https://img.amjun.com/uploads/2023/04/643e056187339.png);
    background-position: center right;
    background-size: auto 100%;
    box-shadow: 0px 5px 40px 0px rgba(17,58,93,0.1);
}

.menu-header-plane > ul {
   background-color: rgba(255, 255, 255, 0.96);
    background: unset;
}
url 记得修改为自己的链接。
插入css 代码即可,彩色滚动条 css 代码如下:
/**彩色滚动条*/
::-webkit-scrollbar {
    width: 8px;
    height: 1px;
}
::-webkit-scrollbar-thumb {
    background-color: #12b7f5;
    background-image: -webkit-linear-gradient(45deg, rgba(255, 93, 143, 1) 25%, transparent 25%, transparent 50%, rgba(255, 93, 143, 1) 50%, rgba(255, 93, 143, 1) 75%, transparent 75%, transparent);
}
::-webkit-scrollbar-track {
    -webkit-box-shadow: inset 0 0 5px rgba(0,0,0,0.2);
    background: #f6f6f6;
}/*文章图片悬浮效果*/
.post-content-content img {
transition: All 0.4s ease-in-out;
-webkit-transition: All 0.4s ease-in-out;
-moz-transition: All 0.4s ease-in-out;
-o-transition: All 0.4s ease-in-out;
margin: 10px 0;
}
.post-content-content img:hover {
transform: translate(0, -10px);
-webkit-transform: translate(0, -10px);
-moz-transform: translate(0, -10px);
-o-transform: translate(0, -10px);
-ms-transform: translate(0, -10px);
box-shadow:5px 5px 10px gray;
}
分为三个步骤:
1.将下面的 PHP 代码加入到主题目录下:themes/主题/functions.php 文件中。
//文章过期提示开始
function article_time_update() {
    date_default_timezone_set('PRC');
    $newdate=time();
    $updated_date = get_the_modified_time('Y-m-d H:i:s');
    $updatetime=strtotime($updated_date);
    $custom_content = '';
    if ( $newdate > $updatetime+86400) {
    $custom_content= '<div class="article-timeout"><strong><i class="fa fa-bell" aria-hidden="true"></i> 温馨提示:</strong>本文最后更新于<code>'. $updated_date . '</code>,某些文章具有时效性,若有错误或已失效,请在下方<a href="#comment">留言</a>或联系<a target="_blank" title="YOY-小站" href="http://wpa.qq.com/msgrd?v=3&uin=3064305626&site=qq&menu=yes"><b>悠悠站长</b></a>。</div >';
    }
        echo $custom_content;
    }
//文章过期提示结束说明:请自己修改上面有关于自己网站的信息,改成自己网站信息即可,图标可以用阿里矢量图。
2.在主题目录themes/主题/single.php 文件中,文章分页函数下面添加下方代码即可。
PHP 代码:
article_time_update();//文章过期提示插入到合适的位置即可!
3.CSS 代码:(在自定义 CSS 样式添加下面代码)
/*过期文章提示样式*/
.article-timeout{position:relative; border-radius: 8px; position: relative; margin-bottom: 25px; padding: 10px; background-color: var(--body-bg-color);}有朋友联系想要这个效果功能,因为最近比较忙,一直没有分享,正好趁着这次分享一次性分享给大家
使用方法
- 1、在 zibll 主题目录下,themes/主题/footer.php文件中的顶部添加下面添加下面的代码:
<!---给网站数据库查询&页面加载耗时功能--->
<center>
<p> 本次数据库查询:<?php echo get_num_queries(); ?>次 页面加载耗时<?php timer_stop(3); ?> 秒</p>
</center>
<!---网站数据库查询&页面加载耗时功能--->左侧联系站长代码+CSS
<!--左侧联系站长 -->
<a href="http://wpa.qq.com/msgrd?v=3&uin=1326145460&site=qq&menu=yes" target="_blank" class="contact-help main-shadow" style="font-weight:700;">联系站长</a>
<style>
element.style {
font-weight: 700;
}
.more-posts a>span, .relates-thumb li a>.post-info, a[href] {
transition: color .2s,background .3s,opacity .3s,box-shadow .3s,transform .3s;
}
.contact-help {
position: fixed;
z-index: 101;
left: 0;
top: calc(50% - 30px);
margin-top: -36px;
width: 28px;
height: 72px;
transition: all .3s;
font-size: 12px;
background: var(--main-bg-color);
border-radius: 0 5px 5px 0;
padding: 8px 7px;
line-height: 14px;
}
.box-img, .drop-btn, .passw, .pointer, [href], a.but, botton {
cursor: pointer;
}
.main-shadow {
box-shadow: 0 0 10px var(--main-shadow);
}
</style>
<!--左侧联系站长 -->主题设置 - 插入代码 - 自定义CSS :
.site-info-list .data-item:nth-child(3) div span::before {
content: "9999";
}
加入上述代码即可装逼

<div>
        <fieldset
            style=" border: 1.5px dashed #008cff; padding: 10px; border-radius: 5px; line-height: 2em;font-weight: 700;color: var(--key-color);background-color: var(--body-bg-color);">
            <legend align="center"
                style=" margin-bottom: -2px;width: 30%;text-align: center; background-color: #008cff; border-radius: 999px; background-image: linear-gradient(to right, #FFCC99, #FF99CC);border: 1.5px dashed #008cff;">
                版权声明
            </legend>
            <span class="btn-info btn-xs">1</span> 本网站名称:<span style="color: #3333ff"><span
                    style="color: #09ace2; font-size: 15px"><strong>资源网-分享有价值的资源</strong></span></span><br>
            <span class="btn-info btn-xs">2</span> 本站永久网址:<a href="http://www.xxxx.cn"
                style="color: #09ace2;">http://www.xxxx.cn</a><br>
            <span class="btn-info btn-xs">3</span> 本网站的文章部分内容可能来源于网络,仅供大家学习与参考,如有侵权,请联系站长 QQ<a
                href="http://wpa.qq.com/msgrd?v=3&uin=123456&site=qq&menu=yes" target="_blank"
                style="color:#09ace2;">123456</a>进行删除处理。<br>
            <span class="btn-info btn-xs">4</span> 本站一切资源不代表本站立场,并不代表本站赞同其观点和对其真实性负责。<br>
            <span class="btn-info btn-xs">5</span> 本站一律禁止以任何方式发布或转载任何违法的相关信息,访客发现请向站长举报<br>
            <span class="btn-info btn-xs">6</span> 本站资源大都存储在云盘,如发现链接失效,请联系我们我们会第一时间更新。<br>
            <span class="btn-info btn-xs">7</span> 如无特别声明本文即为原创文章仅代表个人观点,版权归《<a href="http://www.xxxxx.cn"
                style="color: #09ace2;">资源网</a>》所有,欢迎转载,转载请保留原文链接。<br>
        </fieldset>
    </div>
独立版本html代码,比较适用博客等支持html代码的声明。
<style>
        fieldset {
            border: 1.5px dashed #008cff;
            padding: 10px;
            border-radius: 5px;
            line-height: 2em;
            font-weight: 700;
            color: var(--key-color);
            background-color: var(--body-bg-color);
        }

        legend {
            align-items: center;
            margin-bottom: -2px;
            width: 30%;
            text-align: center;
            background-color: #008cff;
            border-radius: 999px;
            background-image: linear-gradient(to right, #FFCC99, #FF99CC);
            border: 1.5px dashed #008cff;
        }
    </style>
<fieldset>
            <legend style="color: #000">
            免责声明:
            </legend>
    本站提供的一切软件、教程和内容信息仅限用于学习和研究目的;不得将上述内容用于商业或者非法用途,否则,一切后果请用户自负。本站信息来自网络收集整理,版权争议与本站无关。您必须在下载后的24个小时之内,从您的电脑或手机中彻底删除上述内容。如果您喜欢该程序和内容,请支持正版,购买注册,得到更好的正版服务。我们非常重视版权问题,如有侵权请邮件与我们<a href="/delete.html" target="_blank"><strong>联系处理</strong></a>。敬请谅解!侵删请致信E-mail:123456@qq.com
</fieldset>